Cute Macramé Heart Pattern: How to Make Your Own with Step-by-Step Instructions
Make your own heart macramé hanging.
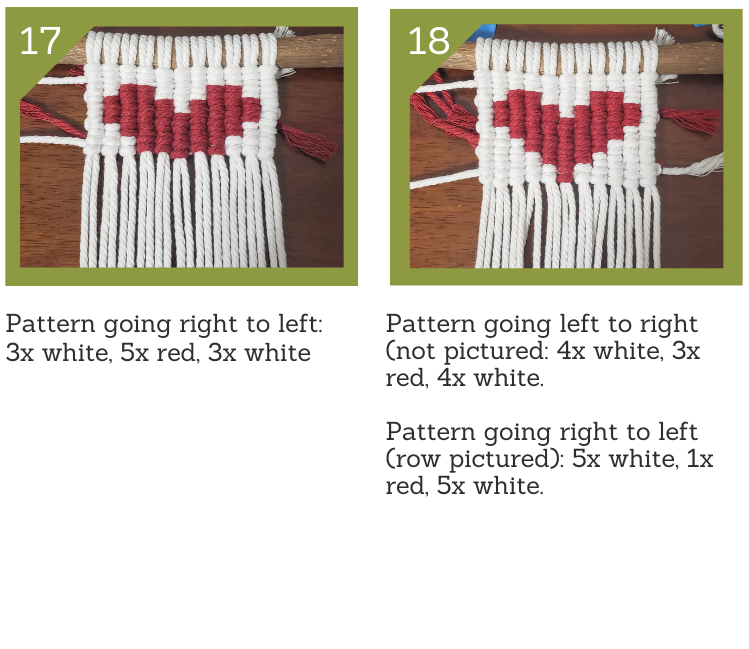
Once you’ve gotten the hang of the vertical clove hitch knot you can let your creativity flow! Imagine pixel art and you can now come up with your own design and create pixelated letters, landscape, and of course, this heart pattern.
This step-by-step guide will walk you through adding new cords, giving you practice to do your own designs. However, there are a few important tips if this is your first vertical CHK pattern.
⋒ eBook with knots and its step-by-step instructions with pictures here.
Before you start...
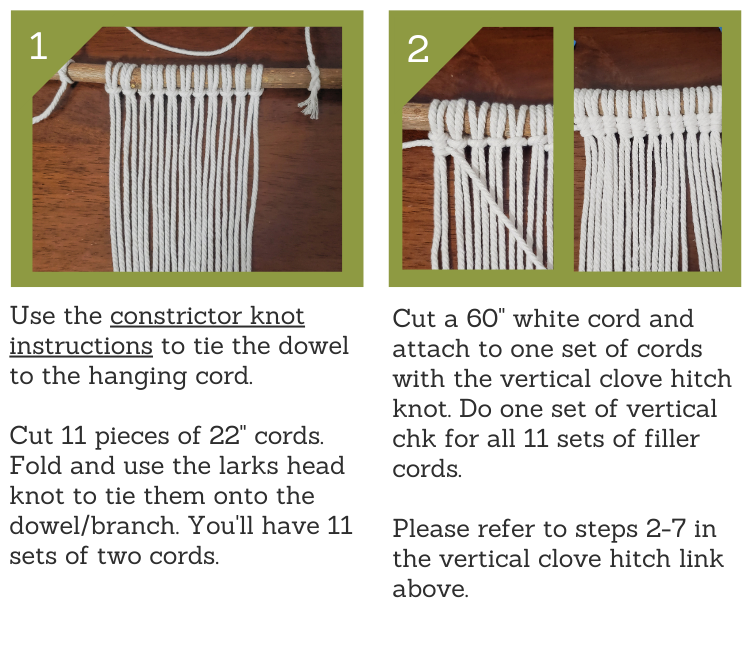
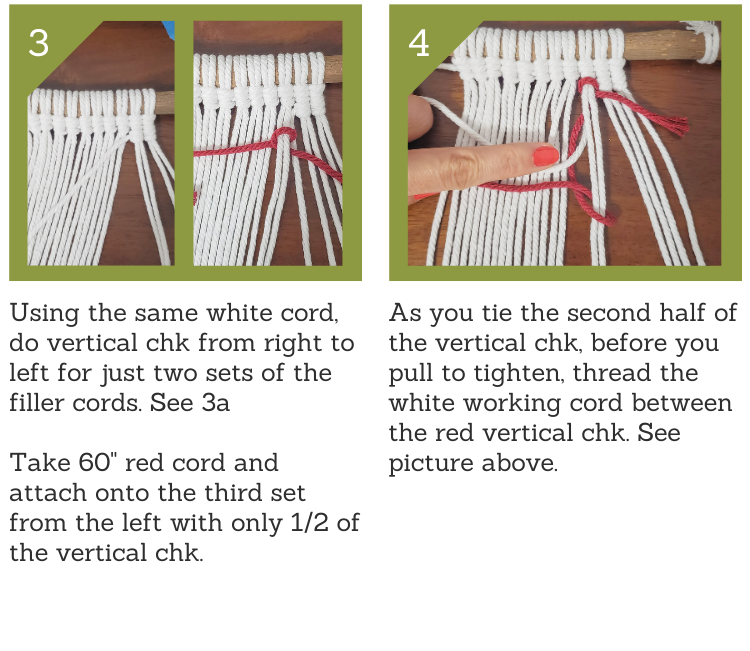
1. Please make sure you know how to start a vertical clove hitch knot. This is crucial because it is the same method to adding in new colors.
2. You should know the difference between working cords (the ones you use to create the knot) and filler cords (the cords that holds the knot). In most projects, filler cords can become working cords and visa versa but for this pattern, the filler cords remain consistent.
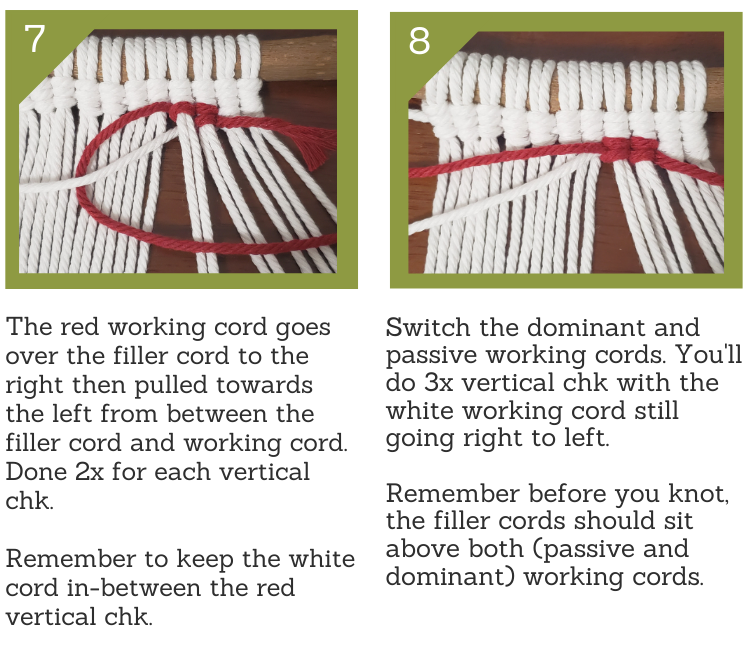
3. In this guide, I will be talking about dominant and passive cords. Both working cords are moving in the same direction but only ONE color will be knotted at a time (dominant) while the passive working cord is “hiding” in the back. The passive cord will be ready to switch to become the dominant working cord when its color is needed for the pattern. [I did this double working cord method to limit the “clean up” after the project is complete.]
4. You’ll need crochet hooks or tapestry needles or plain old needle and string (even dental floss works) if you want to clean up the back of the project by weaving in the cord ends into the project. [I’m working on a guide for this – I’ll come back and link it]
I can’t wait to see everyone’s version of this project – please share with me on Instagram using #easypeasymakers
Materials
You’ll need:
⋒ Cords – I used 3mm cords for this project. [Remember, if you use thicker cords, you will need longer lengths]
1x 30″ for hanging (color of your choice) 11x 22″ white cord 150″ red cord (directions will give you suggested amount to cut) 195″ white cord
⋒ Scissors ⋒ Ruler ⋒ Dowel or branch (you can also make it on another cord) ⋒ Crochet hook or Tapestry needle or Needle and String ⋒ Painters tape or wall hooks (to anchor your project as you knot)


[…] was a recent post with a heart pattern using VCHK. This post will cover how to tidy up the […]
[…] knots would go well on the bottoms of the heart pattern. Share your projects with me on Instagram and use tag […]