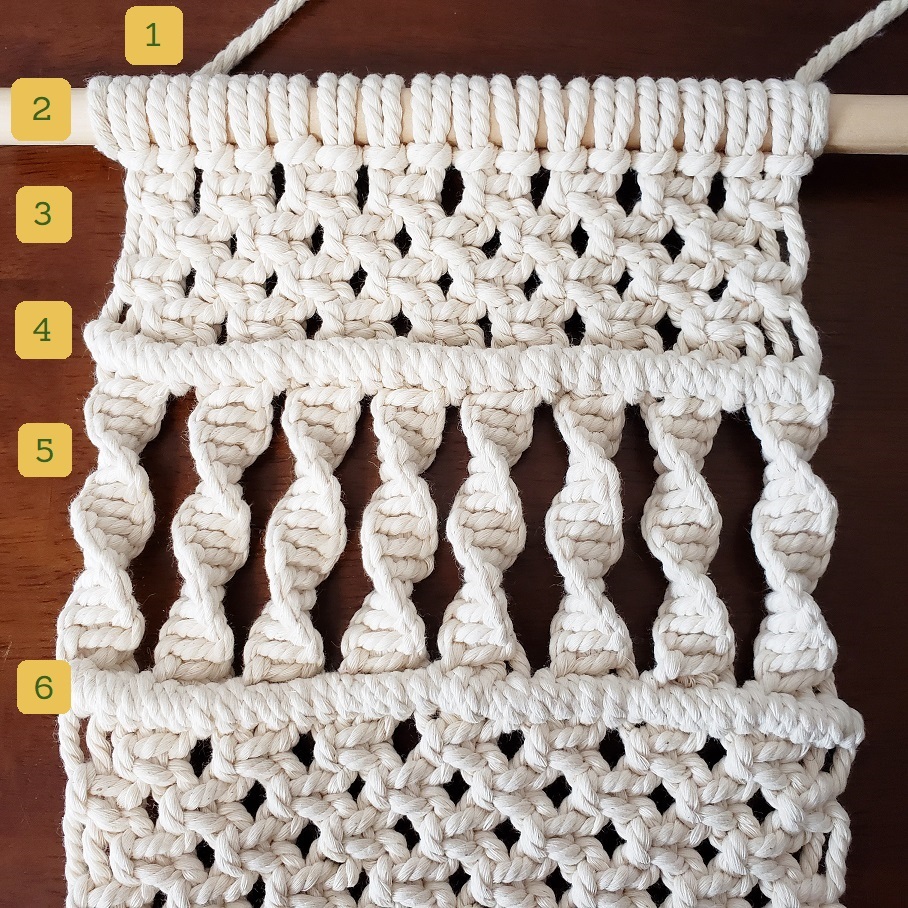
Make Your Own Macramé Hanging – Perfect For Beginners!

If you’ve been following along, you’ve got all the tools to make your own macramé wall hanging! This is a free pattern (hopefully one of many more to come in varying difficulty levels) but feel free to modify and add to fit your design and creation!

Share with me your results and changes on Instagram using hashtag #EasyPeasyMakers

WallHanging_Indoors

For this pattern, you’ll need:
✔ Macrame cord
✔ Tape Measure
✔ Dowel or branch (around 10″)
✔ Scissors

Make sure you know the following knots:
Larks Head Knot
Square Knot
Clove Hitch Knot (Horizontal)
Spiral Knot
Constrictor Knot

WallHanging_Numbered

Cord Length and Size:
– Macramé rope in 4mm
– 16 cords at 126″
– 1 cord at 20″

Step 1:
Attach your 20″ cord using the constrictor knot on both ends of the dowel. Hang the dowel or tape down to attach the remaining cords.

Step 2: 
Use the Lark’s Head Knot for all 16 cords, folded and knotted on the dowel. 

Step 3: 
1st Row – 8 Square Knots
2nd Row – Alternating from 1st row,  7 square knots.
3rd Row – 8 Sq Knots
4th Row – 7 Sq Knots

Step 4: 
Use the outer most left cord as the filler cord, do Clove Hitch Knot – Horizontal all the way across.

Step 5:
Group the cords into four and spiral knot. There should be 8 spirals, each 2.5″. (16 spiral knots)

Step 6:
Use the outer most left cord as the filler cord, do Clove Hitch Knot – Horizontal all the way across.

WallHanging_BottomNumbered

Step 7:
Set aside the two outer most cords on the left and start your sq knots.

1st Row – 7 Square Knots
2nd Row – Alternating from the above row,  do 8 square knots.
3rd Row – 7 Sq Knots
4th Row – 8 Sq Knots
5th Row – 7 Sq Knots
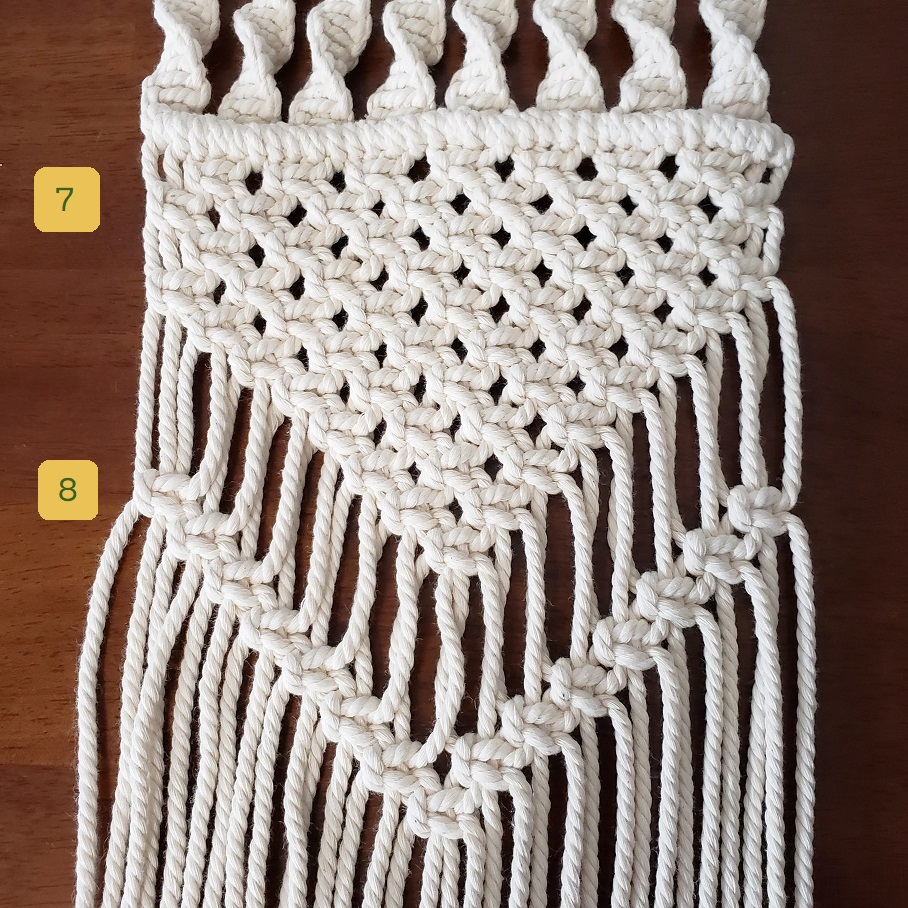
6th Row – 6 Sq Knots
7th Row – 5 Sq Knots
8th Row – 4 Sq Knots
9th Row – 3 Sq Knots
10th Row – 2 Sq Knots
11th Row – 1 Sq Knots
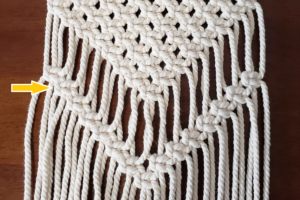
Step 8:
Take the first set of four cords from the left and at 2″ down, make a square knot.

From the sq knot you just made, use the two right cords from that set along with two adjacent cords next to the square knot and make a square knot below the first square knot. 
(See image below)

WallHanging_Beginner_Step8

Repeat the patter with the second sq knot by taking the two right cords from that set and the two adjacent cords and make another sq knot right below the second. It will start to cascade down. 

Continue for 5 more knots, total 7 sq knots on the left side. 

Repeat on the right side of the project – remember the 2″ gap and 7 sq knots down. 

The left and right side knots should line up and you can finish the 8th and center sq knot at the bottom by taking two right cords from left side and two left cords from the right side and make your last sq knot. 

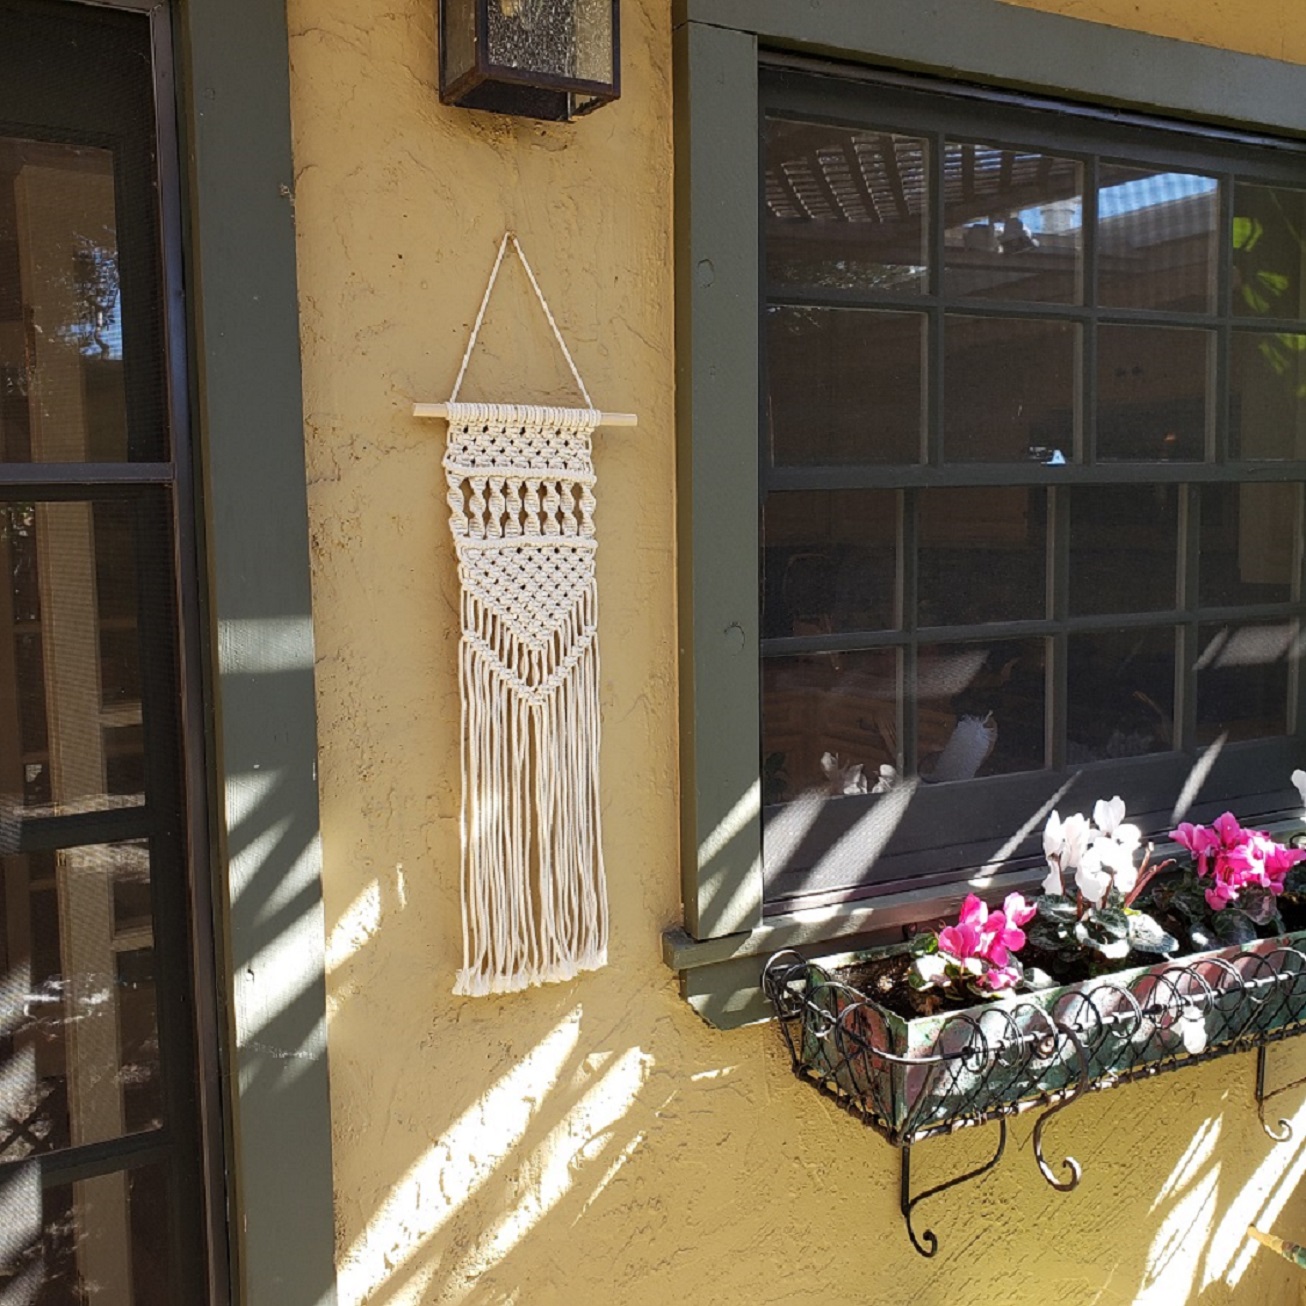
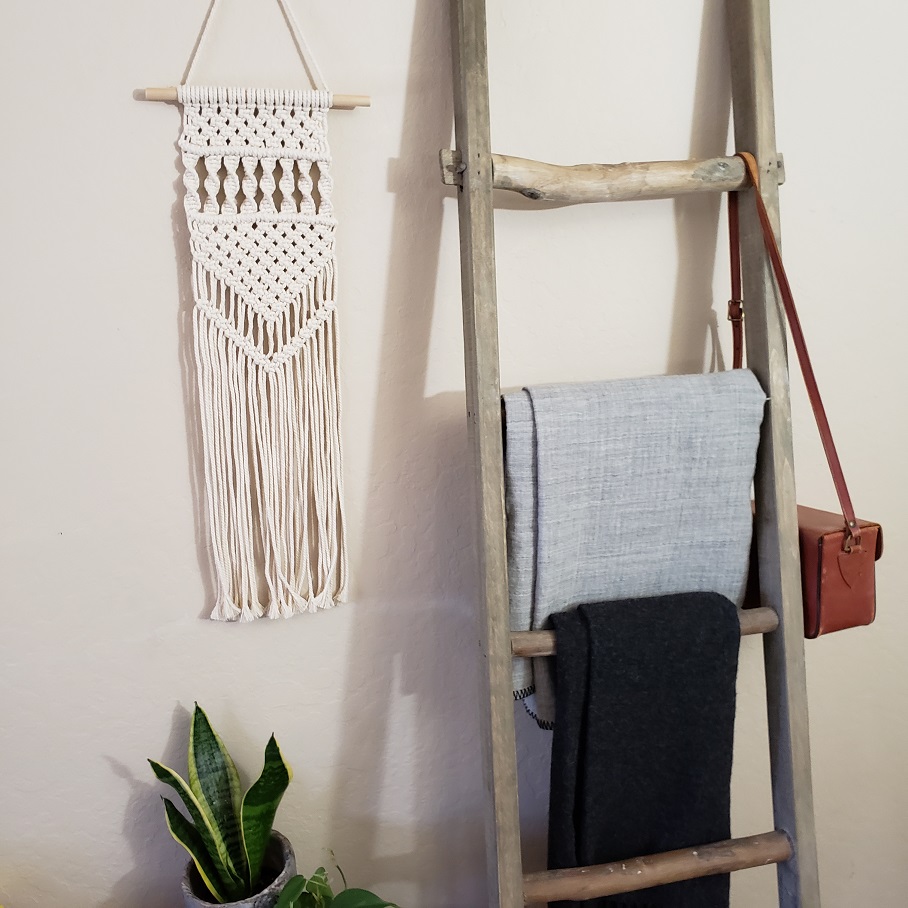
TADA. You’re done! Feel free to leave as is or cut for a clean line or angled cut. Add beads or barrel knots. The design is up to you to make it yours! 

Happy Knotting!